Before you begin assembling your wedding invitations, make sure you have all the materials you need, including the main invitation cards, RSVP cards, envelopes, additional cards or inserts, reception cards (if applicable), and any enclosure cards.
Step 2: Organize and Prepare the Invitation Components
Take time to organize and prepare all the invitation components. This involves arranging the cards in the desired order, folding any cards or inserts if necessary, and ensuring that all the pieces are ready for assembly.
Step 3: Start with the Main Invitation
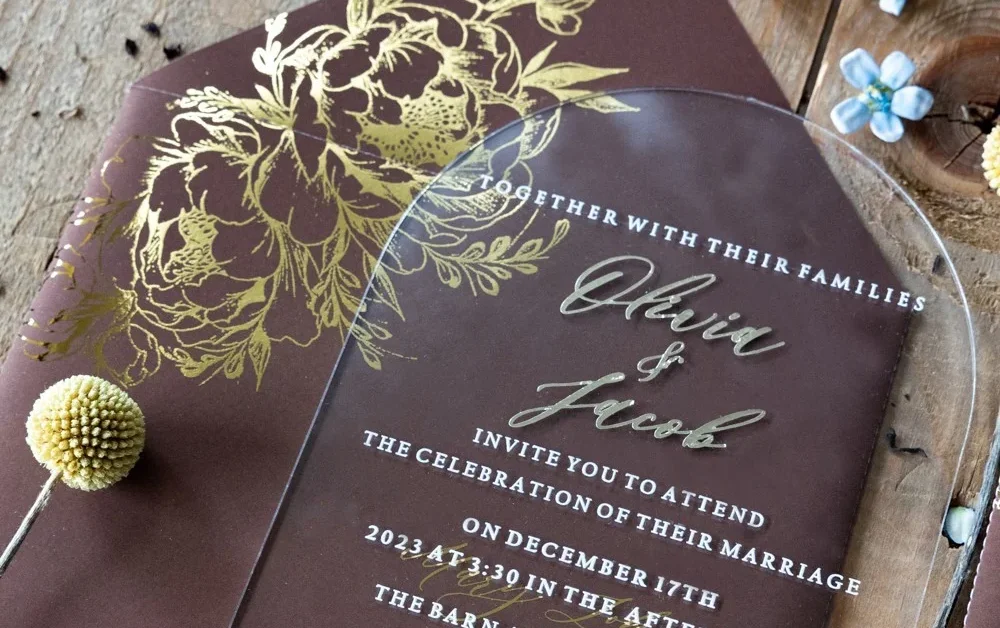
Begin by placing the main invitation card with the wording facing up. This will serve as the centerpiece of your invitation suite.
Step 4: Place any Additional Cards or Inserts
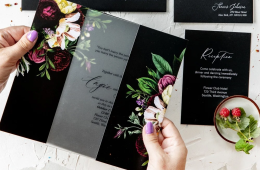
If you have any additional cards or inserts, such as information about accommodations or directions, carefully place them on top of the main invitation. Make sure they are neatly stacked and aligned.
Step 5: Arrange the RSVP Card and Envelope
Next, include the RSVP card and envelope. Place the RSVP card on top of the other cards, facing the same direction as the main invitation. Insert it into the provided envelope and position it above the main invitation.
Step 6: Add the Reception Card (if applicable)
If you have a separate reception card, place it above the RSVP card and envelope. This card typically includes details about the wedding reception, such as the venue and time.
Step 7: Include any Enclosure Cards
If you have additional enclosure cards, such as a map or information about wedding registries, position them above the reception card or any other cards you have included. Make sure they are stacked neatly and easily visible.
Step 8: Assemble the Invitation Suite
Once all the components are in place, carefully stack the entire invitation suite together. Hold the stack with one hand while using your other hand to slide the invitation suite into the envelope. Ensure that everything fits comfortably and is not too tightly packed.
By following these steps, you can assemble your wedding invitations with ease and create a beautifully presented invitation suite that reflects your style and sets the tone for your special day.
Key takeaway:
Assembling wedding invitations requires gathering all the necessary materials beforehand.
Organizing and preparing the invitation components is essential for a smooth assembly process.
A step-by-step approach, starting with the main invitation and adding additional cards or inserts, ensures a well-arranged invitation suite.
Step-by-Step Guide: How to Assemble Wedding Invitations
Planning a wedding is an exciting endeavor, but when it comes to assembling wedding invitations, it can often feel overwhelming. Fear not! In this step-by-step guide, we'll walk you through the process of assembling your wedding invitations with ease. From gathering all the necessary materials to arranging the RSVP card and envelope, each sub-section will cover essential tips and tricks to ensure your invitation suite comes together flawlessly. Let's dive in and make assembling your wedding invitations a stress-free experience!
Step 1: Gather all the Necessary Materials
In order to successfully assemble wedding invitations, it is important to gather all the necessary materials. This step-by-step guide will provide you with a comprehensive list of what you will need:
Invitation Cards: Begin by collecting the main invitation cards that accurately represent the theme and style of your wedding.
RSVP Cards and Envelopes: Make sure to gather RSVP cards and envelopes to enable your guests to respond.
Reception Cards: If you have a separate reception, procure reception cards that include the location, time, and other relevant details.
Additional Cards or Inserts: Depending on the specifics of your wedding, you may require extra cards or inserts for directions, accommodation details, or information regarding your wedding website.
Envelopes: Remember to include envelopes for the main invitation, RSVP cards, and any additional cards or inserts.
Printing Materials: If you plan on printing your own invitations, ensure you have an adequate supply of printer paper, ink, and envelopes.
Sealing Tools: Enhance the appearance of your invitations by considering the use of sealing wax, a wax seal stamp, or other sealing tools.
Tools: Acquire scissors or a paper trimmer to assist in cutting the invitation cards, and use a ruler for accurate measurements.
Optional Embellishments: For further personalization, gather embellishments such as ribbon, lace, or decorative elements to adorn your invitations.
By gathering all the necessary materials beforehand, you can ensure a smooth process and easily progress to the subsequent steps outlined in this guide.
Step 2: Organize and Prepare the Invitation Components
When organizing and preparing the invitation components for wedding invitations, follow these steps:
Step 1: Sort the invitation components: Gather all the invitation components, including the main invitation, additional cards or inserts, RSVP card and envelope, reception card, and any enclosure cards. Organize them in separate piles for easy access during assembly.
Step 2: Check for accuracy: Double-check all the components for accuracy. Ensure the wording, dates, and other details are correct.
Step 3: Arrange personalized inserts: Separate personalized inserts, such as inner envelopes with guest names or RSVP cards with pre-printed addresses, from blank ones. This streamlines the assembly process.
Step 4: Prepare the envelopes: Address the outer envelopes by hand or using printed labels. Include names and addresses of recipients. Affix decorative seals or envelope liners, if desired.
Step 5: Attach inserts to the main invitation: Place additional cards or inserts on top of the main invitation, align them properly, and secure them with adhesive or ribbon.
Step 6: Insert the RSVP card: Place the RSVP card and envelope inside the inner envelope or directly into the outer envelope, depending on the chosen format. Ensure easy accessibility for guests to respond.
Step 7: Add the reception card: If there is a separate reception card, carefully insert it alongside the main invitation or within the inner envelope. Check its placement for a clean and organized look.
Step 8: Include any enclosure cards: Insert additional enclosure cards, such as accommodation details, directions, or wedding website information, in the appropriate order. Avoid overcrowding the envelope.
By following these steps, you can efficiently organize and prepare the invitation components for a seamless assembly process. Remember to review the final assembled invitation suite before sending them out to ensure everything is in order.
Step 3: Start with the Main Invitation
When assembling wedding invitations, it's important to start with the main invitation. Follow these steps for a smooth process:
Step 1: Prepare the main invitation component on a flat surface.
Step 2: Gather necessary materials like the main invitation envelope, response card, and other inserts.
Step 3: Start with the main invitation in the envelope with the wording facing up and the folded edge at the bottom. Ensure it is centered and straight.
Step 4: Arrange additional cards or inserts, such as reception cards or accommodation cards, in the desired order. Place them on top of the main invitation inside the envelope.
Step 5: Prepare the RSVP card and envelope. Place the response card on top of the main invitation, facing up, and align the edges. Slip it under the flap of the response card envelope.
Step 6: If you have a separate reception card, place it on top of the RSVP card, aligning the edges. You can also slip it under the flap of the response card envelope.
Step 7: For any enclosure cards, such as directions or additional information, place them on top of the reception card within the envelope.
Step 8: Seal the main invitation envelope using a sticker, wax seal, or glue to securely close it.
By following these steps, you can ensure that your main wedding invitation is properly prepared and organized. Double-check everything before sealing the envelope to avoid mistakes or omissions. Your main invitation sets the tone for your wedding, so take the time to make it look beautiful and professional.
Step 4: Place any Additional Cards or Inserts
When putting together wedding invitations, Step 4 involves the placement of any additional cards or inserts. This step is essential in ensuring that all the necessary information is included. Here is a helpful guide on how to properly insert these cards or inserts:
Prepare the additional cards: Gather RSVP cards, reception cards, accommodation cards, and direction cards.
Organize the cards in your desired order: Typically, the RSVP card would come first, followed by the reception card, accommodation card, and any other inserts.
Place the cards inside the main invitation: Carefully insert each additional card one by one, arranging them neatly so that they are easily visible.
Secure the cards in place: Use double-sided tape or a glue dot to prevent the cards from falling out when the invitations are mailed.
Double-check the placement: Make sure that the cards are inserted correctly and that all the necessary information is included.
Close the invitation: Gently close the invitation without any bulges or gaps.
Repeat the process for each invitation: Follow the above steps for every wedding invitation in the set, taking your time to assemble accurately and create a cohesive look.
By following these steps, you can successfully place any additional cards or inserts in your wedding invitations. Pay close attention to detail and organize the cards to create a beautiful and informative invitation suite for your special day.
Step 5: Arrange the RSVP Card and Envelope
When arranging the RSVP card and envelope, follow these steps to ensure they are correctly positioned and secure within the main envelope:
1. Place the RSVP card on top of the main invitation with the text facing up.
2. If there is an RSVP envelope, tuck it under the flap of the main envelope, behind the RSVP card with the flap facing up.
3. Center the RSVP card and envelope within the main envelope.
4. If there are additional items like reception cards or accommodation cards, arrange them neatly behind the RSVP card.
5. Ensure that all the cards are aligned and facing the same direction within the envelope.
6. If there are multiple enclosure cards, prioritize them in order of importance, with the most important card on top.
7. Consider using adhesive dots or double-sided tape to secure the cards in place if needed.
8. Gently slide the stack of cards into the main envelope, ensuring it fits comfortably without bending or creasing.
9. Seal the main envelope securely.
By following these steps, you can ensure that your guests receive all necessary information and can easily respond to the invitation. Remember to double-check the alignment and neatness of the cards before sealing the envelope. To add an elegant touch to your wedding invitations, consider using custom stamps or wax seals for a personal touch.
Step 6: Add the Reception Card
Once you have placed the invitation and additional cards in the envelope, add the reception card.
The reception card provides important details about the wedding reception, such as the venue, date, time, and any special instructions.
Carefully slide the reception card into the envelope, making sure it fits neatly alongside the other cards.
If the reception card is smaller than the invitation, you can place it on top or behind the invitation.
Ensure that the reception card aligns with the other cards and does not stick out.
If you have multiple reception events or venues, include separate reception cards for each.
Double-check that all the necessary information on the reception card is accurate and up to date.
After adding the reception card, include any enclosure cards, if applicable.
Once all components are in place, seal the envelope to be delivered to your guests.
Suggestions:
Consider using high-quality cardstock or paper for the reception card to complement the overall aesthetic.
Use elegant fonts and clear typography for easy readability.
For a minimalist design, combine ceremony and reception details on a single-sheet reception card.
Personalize the card with a monogram or design element that reflects your wedding theme.
Proofread the reception card multiple times to avoid errors and have someone else review it as well.
Step 7: Include any Enclosure Cards
Step 7: Include any Enclosure Cards
Choose appropriate enclosure cards, such as reception details, accommodation information, and wedding website, to provide guests with the necessary information.
Make sure to print and prepare the enclosure cards before assembling the invitations.
Position the enclosure cards neatly behind the main invitation, stacking them in order of importance, with the topmost card being the most important.
If there are multiple enclosure cards, secure them with a ribbon or paperclip to prevent any loss or misplacement.
To avoid adding excess bulk, ensure that the enclosure cards fit comfortably within the envelope.
If you are using an inner envelope, insert the main invitation with the enclosure cards facing the back flap of the envelope.
Seal the inner envelope and place it into the outer envelope with the guests' names facing the front. Make sure to seal the outer envelope securely.
Address the envelopes with the guests' names and appropriate titles, and include your return address on the back flap of the outer envelope.
When including any enclosure cards, remember to keep them organized and presentable in order to provide guests with the necessary information for your wedding. Before finalizing the invitations, double-check the details on the enclosure cards to avoid any errors or omissions.
Step 8: Assemble the Invitation Suite
To assemble the wedding invitation suite and complete Step 8, follow these steps:
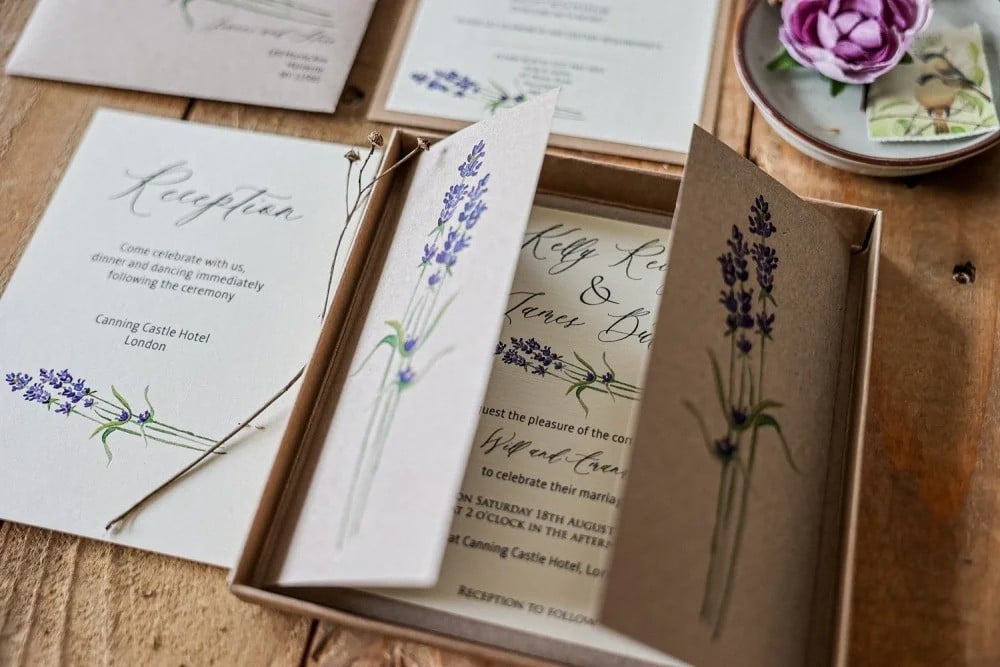
1. Lay out all the necessary materials, including the main invitation, additional cards or inserts, RSVP card and envelope, reception card, and any enclosure cards.
2. Place the main invitation at the bottom of the stack.
3. Add any additional cards or inserts on top of the main invitation, including details like directions, accommodation information, or wedding registry details.
4. Arrange the RSVP card and envelope on top, including a pre-addressed and stamped envelope for convenience.
5. Add the reception card on top of the RSVP card, providing details about the wedding reception.
6. Place any enclosure cards on top of the reception card for additional information.
7. Carefully stack all the components to form the invitation suite, ensuring alignment and order.
8. Double-check everything before sealing the envelopes to avoid mistakes or missing components.
Assembling the invitation suite requires attention to detail and precision to create a cohesive presentation. Follow these steps to ensure your invitations are organized and ready to send. Your invitation suite sets the tone for your wedding, so enjoy the process of creating something special for your guests.
Tips and Suggestions for Assembling Wedding Invitations
Tips and Suggestions for Assembling Wedding Invitations
When assembling wedding invitations, attention to detail is crucial. Here are some tips to ensure that your invitations are beautifully put together:
1. Gather all necessary materials: Before assembling, make sure you have the wedding invitation, response cards, envelopes, enclosures, stamps, and any additional decorative elements.
2. Start with the wedding invitation: Place the invitation on a flat surface facing up, ensuring it is easily readable and positioned correctly.
3. Add the response card: Place the response card on top of the invitation, aligning it neatly and making sure it fits within the envelope.
4. Insert any additional enclosures: If you have other enclosure cards, stack them on top of the response card in order of importance, with the most important card on the bottom.
5. Fold the ensemble: Carefully fold the stacked cards in half, creating a neat crease for a compact and elegant look.
6. Slide the ensemble into the envelope: Gently slide the folded cards into the inner envelope with the text facing the flap, ensuring a snug fit.
7. Seal the envelope: Securely seal the inner envelope with a glue stick or wax seal for protection and sophistication.
8. Address the outer envelope: Use elegant calligraphy or printed labels to address the outer envelope with the recipients' names and addresses. Include a return address on the back flap.
9. Add postage and embellishments: Affix the required postage to the top right corner of the outer envelope. If desired, add decorative touches such as envelope liners or wax seals.
10. Double-check everything: Before sending out the invitations, carefully review each one for correct addresses, properly sealed envelopes, and accurate postage.
By following these tips, you can assemble your wedding invitations with ease and create a stunning first impression for your guests. Attention to detail and a personal touch make your invitations truly special.
Common Mistakes to Avoid in Assembling Wedding Invitations
Common Mistakes to Avoid in Assembling Wedding Invitations
When assembling wedding invitations, avoid these common mistakes:
1. Check your guest list: Double-check names for correct spelling and titles to avoid confusion or embarrassment.
2. Organize the components: Lay out all the invitation components, including the main invitation card, RSVP card, accommodation card, and any additional inserts. Make sure you have all the necessary elements.
3. Follow the correct order: Start with the main invitation card as the base, followed by additional inserts in order of importance. Place the RSVP card on top of the main invitation.
4. Use a belly band or pocket: If you have multiple inserts or a larger invitation suite, consider using a belly band or pocket to keep everything organized and prevent pieces from getting lost.
5. Choose the right adhesive: Use a strong adhesive like a glue stick or double-sided tape to attach components. Avoid glue dots or glue that may leave residue or damage the invitation.
6. Triple-check the details: Before sealing the envelopes, carefully review the date, time, venue, and look for grammatical errors or missing information. Have someone else review the invitations too to catch any mistakes.
7. Address the envelopes correctly: Accurately and legibly address each envelope, including full names and titles of each recipient. Write the return address on the back flap of the envelope.
8. Consider weighing the invitations: If your invitation suite is bulky or includes additional inserts, have them weighed at the post office to determine the correct postage. Insufficient postage may cause delays or non-delivery.
To avoid mistakes, pay attention to detail, stay organized, and follow proper etiquette when assembling wedding invitations. Taking the time to carefully assemble and review your invitations will ensure they are sent flawlessly and make a beautiful impression on your guests.
Some Facts About How To Assemble Wedding Invitations:
✅ Assemble wedding invitations by laying the invitation down with the wording facing up.
✅ Place the reception card on top of the invitation with the wording facing up.
✅ Tuck the response card under its envelope flap and place it on top of the reception card.
✅ Repeat the process for all other enclosure cards such as direction cards and accommodation cards.
✅ Place the fully assembled invitation suite inside the inner envelope and then place the inner envelope inside the outer mailing envelope with the front of the inner envelope facing you.
Frequently Asked Questions
1. What is the recommended order for assembling wedding invitations?
The recommended order for assembling wedding invitations is to start with the invitation, followed by any vellum overlays or tissue paper. Next, place the reception card on top of the invitation, followed by other enclosure cards. The RSVP card should be placed face down on top of the enclosure cards, with the reply card inserted under the envelope flap.
2. How can I ensure there are no spelling errors on my wedding invitations?
To ensure there are no spelling errors, it is important to proofread your wedding invitations thoroughly. Confirm the spelling of guests' names on both the outer and inner envelopes. If you are unsure about a guest's name, consult a family member who knows them well.
3. How do I assemble a folding wedding invitation?
If you have a folding wedding invitation, place the enclosure cards face-up inside the fold over your wedding invitation wording. This will keep all the pieces neatly organized.
4. Should I include a vellum overlay on my wedding invitations?
Including a vellum overlay on your wedding invitations is a personal choice. If you prefer a delicate and translucent touch, you can add a vellum overlay. It adds an elegant and romantic element to the overall design.
5. Do I need to include a hotel accommodations card with my wedding invitations?
Whether to include a hotel accommodations card depends on the specific needs of your wedding guests. If you have guests traveling from out of town or hosting the wedding at a venue that requires accommodations, it is helpful to provide them with the necessary information on a separate card.
6. Is it necessary to create an assembly line for wedding invitation assembly?
Creating an assembly line for wedding invitation assembly is recommended as it speeds up the process. By laying out all the necessary pieces in neat piles, you can easily follow the recommended order of placement for each card and enclosure. It also ensures that you don't miss any important components of the invitation suite.


 How to become a wedding officiant in tennessee ?Read more
 How to bustle a tulle wedding dress ?Read more
 Planning Your Honeymoon Tips for an Unforgettable TripRead more
 The Dos and Donts of Wedding Guest EtiquetteRead more
 The Importance of PreWedding Counseling What You Should KnowRead more
 Can I wear beige to a wedding ?One of the most common questions when it comes to wedding guest attire is whether it's appropriate to wear beige to a...Read more
 Do Jehovah Witnesses celebrate weddings ?Jehovah’s Witnesses are known for their distinctive beliefs and practices, but what about weddings? In this...Read more
 What color shoes with navy dress for Wedding ?Matching shoe color with navy dress When teaming shoe color with a navy dress, it's essential to decide on a hue...Read more
 What to wear to a Church Wedding ?Are you attending a church wedding and unsure about the dress code? Our latest article provides a deep dive into the...Read more
 What does a black wedding ring mean ?Wedding rings are a traditional symbol of love and commitment, but their style and design can vary greatly. In recent...Read more


Top authors